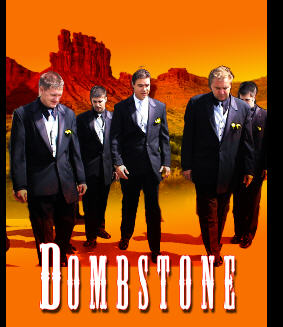
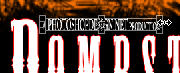
Western Style Poster
|
Click here for secrets of commercial & product advertising design
Get paid for commercial fashion, magazine & product advertising design?!? Yes you! Learn the skills of Madison Avenue Advertising Designers here. (opens in new window)
|
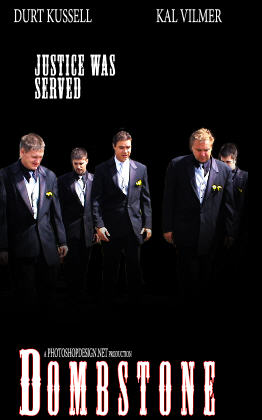
Turn off the tentative paintbrush layer frame and you see a nice
sunset background like they’re walking right off of an old school
matte set backdrop in the old west (nevermind the new tuxedo’s from
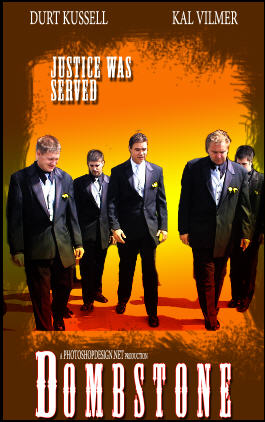
Gingiss). This brighter option also works well. In Photoshop CS you
can create layer comps to show different options to yourself or your
clients without having to turn layers on and off.
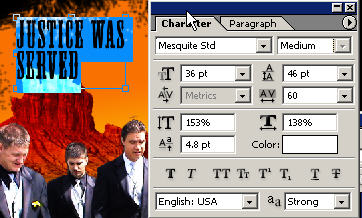
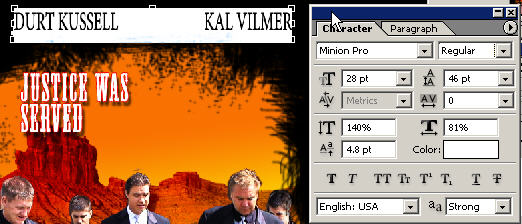
Keeping in line with the ‘poster’ theme of this design, go ahead and add some more complimentary text using the same Mesquite font on a smaller font size.
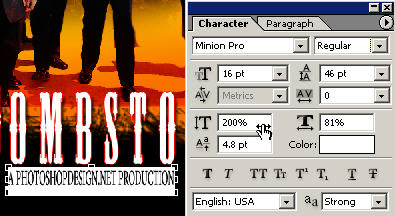
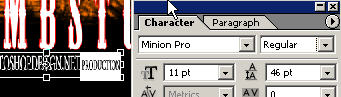
Here’s another Hollywood typography trick. You’ve seen it everywhere in the civilized world (or check your pulse). Use a font such as Minion or Adobe Garamond and make some really small text. The trick here is to stretch it with vertical tracking twice as high, make sure it’s tightly squeezed together and then to veri-size lesser important words. You can do this all within the text editing field. This just takes an extra minute of concerted effort and before you know it; you’ve duplicated a text effect on just about every single movie poster made!
You can also further scale text down with Ctrl T + Shift when you are outside of the text editing field. You can free transform but not distort or perspective unless you rasterize the layer.
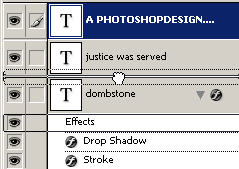
You can drag layer effects by simply grabbing them and dropping them on the base of another layer (text here) with the hand I should start calling ‘Thing’.
My favorite new feature of Photoshop CS? The ability
to use ‘Thing’ in both full screen modes by pressing the space bar
and being able to move the entire design around the whole workspace.
‘Thing’ is otherwise known as the ‘H’and tool.
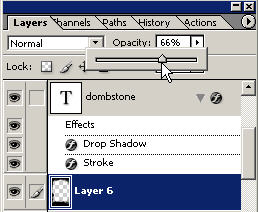
You can lower the opacity of that dark frame paint layer to make it less strong.
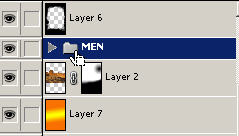
I’ve organized all of the men into a layer set folder (click on the new layer set ‘folder’ icon and drag in layers with Thing in the layers palette).
You can turn layers on and off to see what you’ve
got and see your design in a different ‘light’..
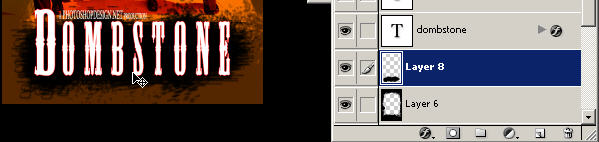
I felt I needed something a little more solid down on the bottom to back up our text so I thought of making a new blank layer and then grabbing a large black brush and creating a brush like rusty underlay base for the text (note the layer order).
|


PHOTOSHOPDESIGN.NET c/o DreamCore Productions, Ltd.
orion@photoshopdesigner.com
Copyright Orion Williams & PhotoshopDesign.net 2004
Adobe, Photoshop, and the Adobe Certified Expert logos are either registered trademarks or trademarks of Adobe Systems, Inc. in the U.S. & other countries. Adobe Product Screen Shots reprinted with permission from Adobe Systems, Incorporated.
BasicPhotoshop.com, AdvancedPhotoshop.com, PhotoshopDownloads.com, PhotoshopDesigner.com, PSDer, iPSD PhotoshopDesign.Net, ClubCast.tv, Discover Photoshop Network, DiscoverPhotoshop.com, PhotoshopRestoration.com, PhotoshopRetouching.com, Digital-Scrapbooking.net, Scrapbook-Templates.com, PhotoshopElements.net & FreePhotoshop.NET are trademarks of DreamCore Productions, Ltd. U.S.A. NAPP is a trademark of PhotoshopUser.com. Use of other trademarks or logos does not imply endorsement from the respective sources.
Contact me for questions, praise or tutorial requests. Join the Free Discover PS Network. Read lots of testimonials.